Recently my daughter Chelsey agreed to let me help her organize her kitchen. More so just the food in her kitchen. It’s a small kitchen in a cute little apartment. Very vintage 1960’s.
Some of the challenges we were up against in her sweet little kitchen. There is no pantry! Yes, you heard me right, there is no pantry in this little kitchen. The cabinets in this kitchen are shallower and shorter then the modern cupboards of today, and the shelves are not adjustable.
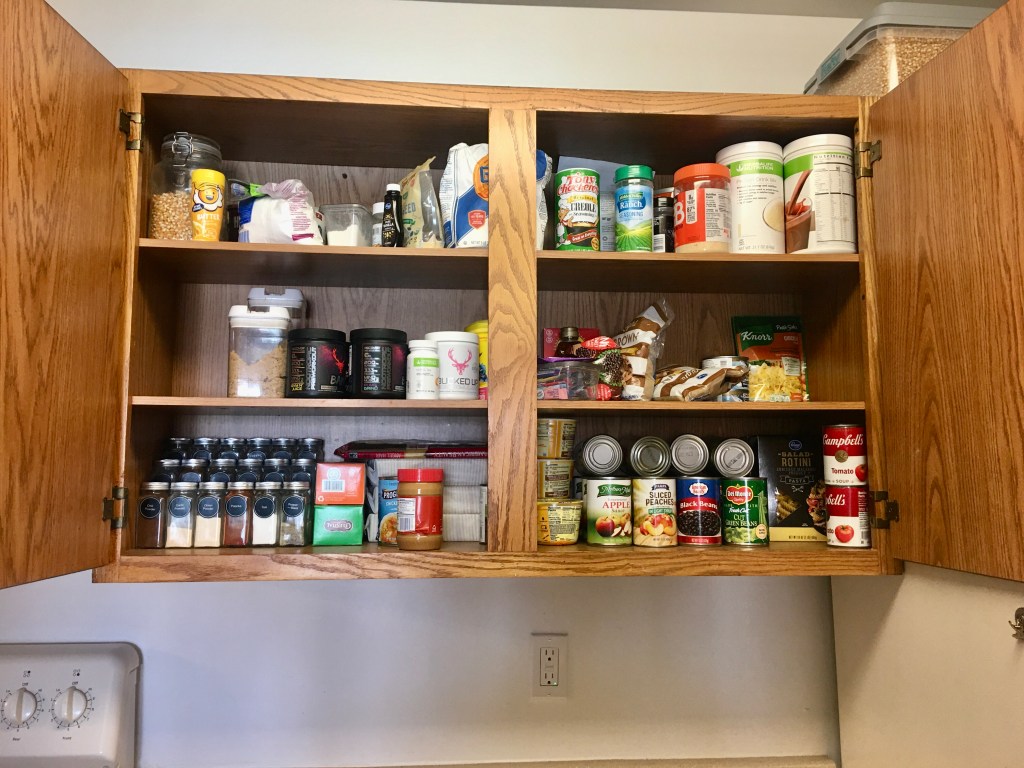
Where we began. Chelsey’s husband Tony took all of the measurements, length, depth, and height for each level. Chelsey took photos of each space that held food, and sent all of the information to me.
I took the information they gave me, sat down with my graph paper and began sketching. First I drew the cabinet to scale.
Then on the back of my graph paper I made a list of the food in the cupboards based on the pictures Chelsey sent me. Then I drew each container and labeled it’s contents.
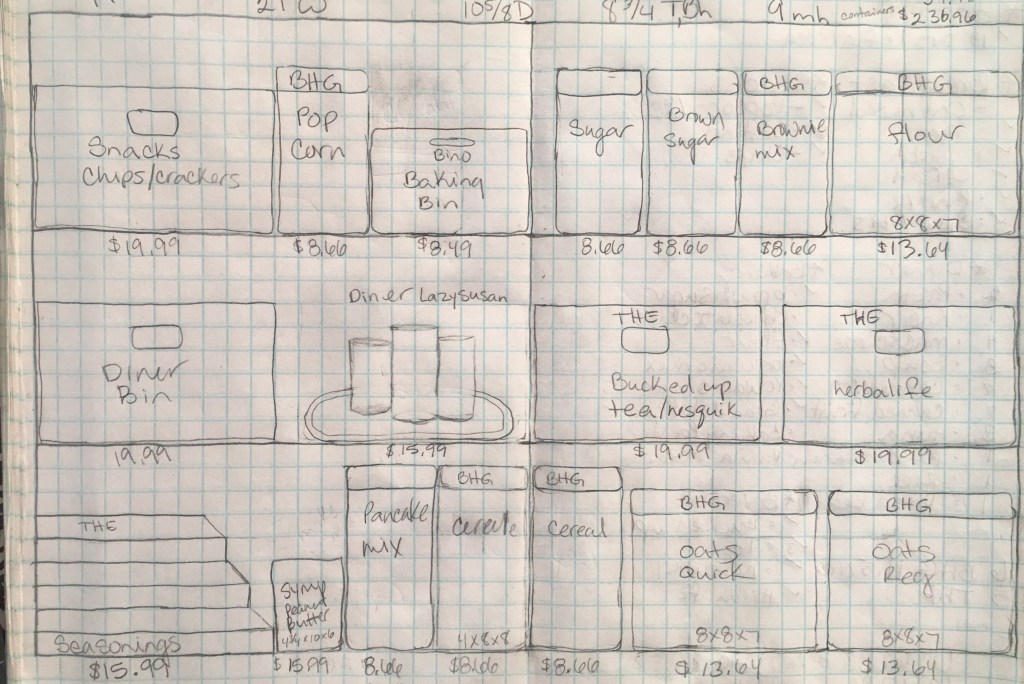
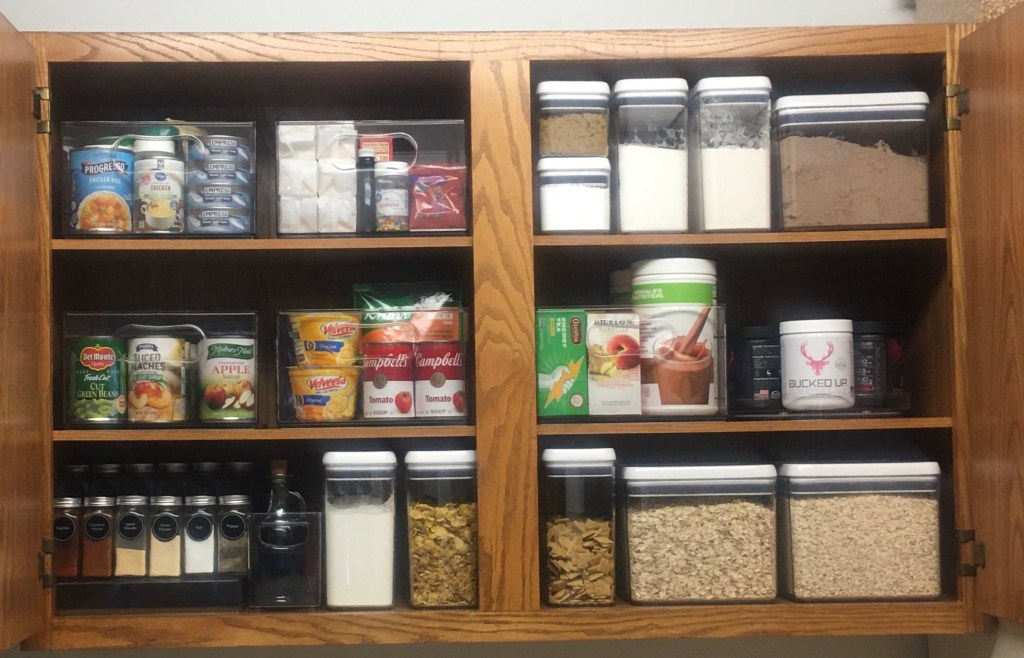
After all of my preliminary research and planning. I went to the internet to figure out the best containers to buy. I found the food containers at Walmart (Better Homes & Gardens) and the clear bins at The Container Store (The Home Edit) collection.
I put the food items into groups, placing like items together. The first level was seasonings and breakfast item’s. The second or middle shelf was dinner and drinks. The top shelf was snacks and baking. With a few adjustments from the drawing everything fit just right.
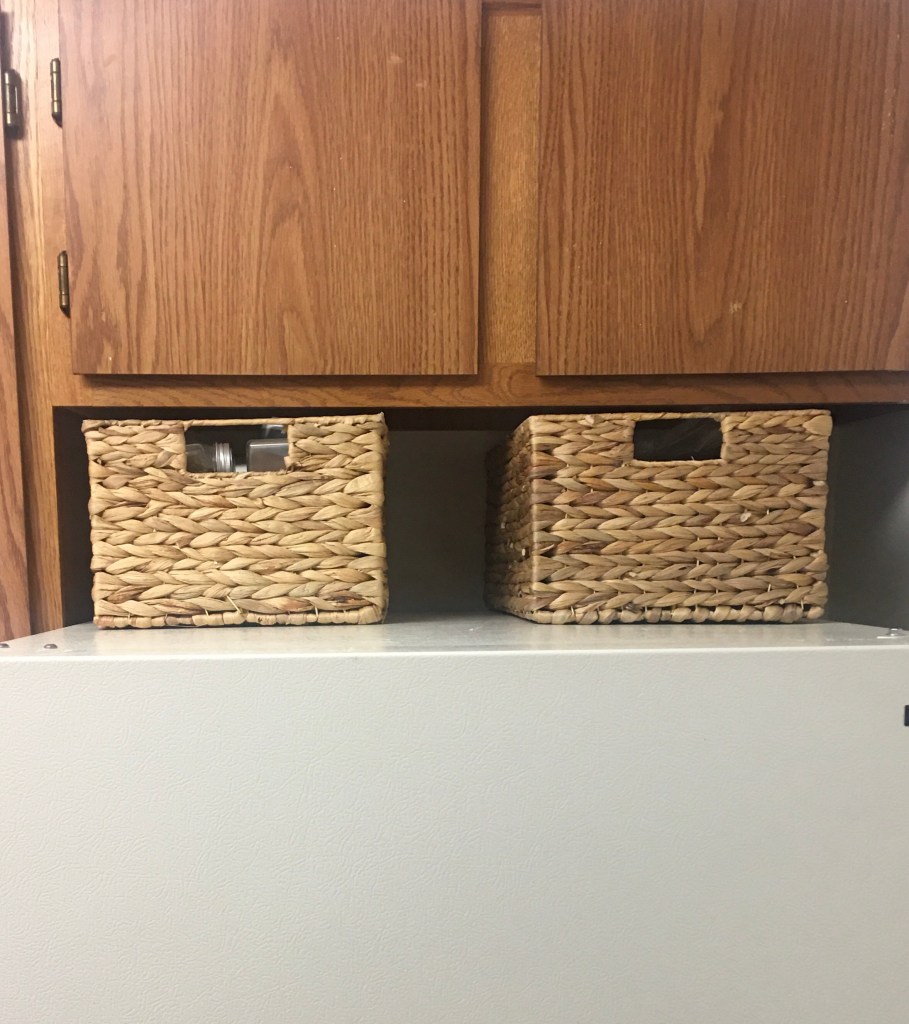
After filling each container, the remaining contents of each bag was rolled up and placed in a basket labeled back stock, and place above the refrigerator.
Large bulk foods such as beans, rice, and popcorn were placed in extra large containers above the stove.

The price for all of the containers came in just under $400. The time it took to complete the project from beginning to end about 5 hours.
You can see more pictures and videos of this project at the links below.
If the button does not work copy and paste the links below.
https://www.instagram.com/reel/CbV47DIga_7/?utm_medium=copy_link

Leave a comment